 |
Motor de Búsqueda de Datasheet de Componentes Electrónicos |
|
|
Motor de Búsqueda de Datasheet de Componentes Electrónicos |
|
HORNETPRO-8R2M Datasheet(PDF) 5 Page - rfsolutions.ltd |
|
|
|||||||||||||||||||||||||||||
HORNETPRO-8R2M Datasheet(HTML) 5 Page - rfsolutions.ltd |
|
|
5 / 7 page 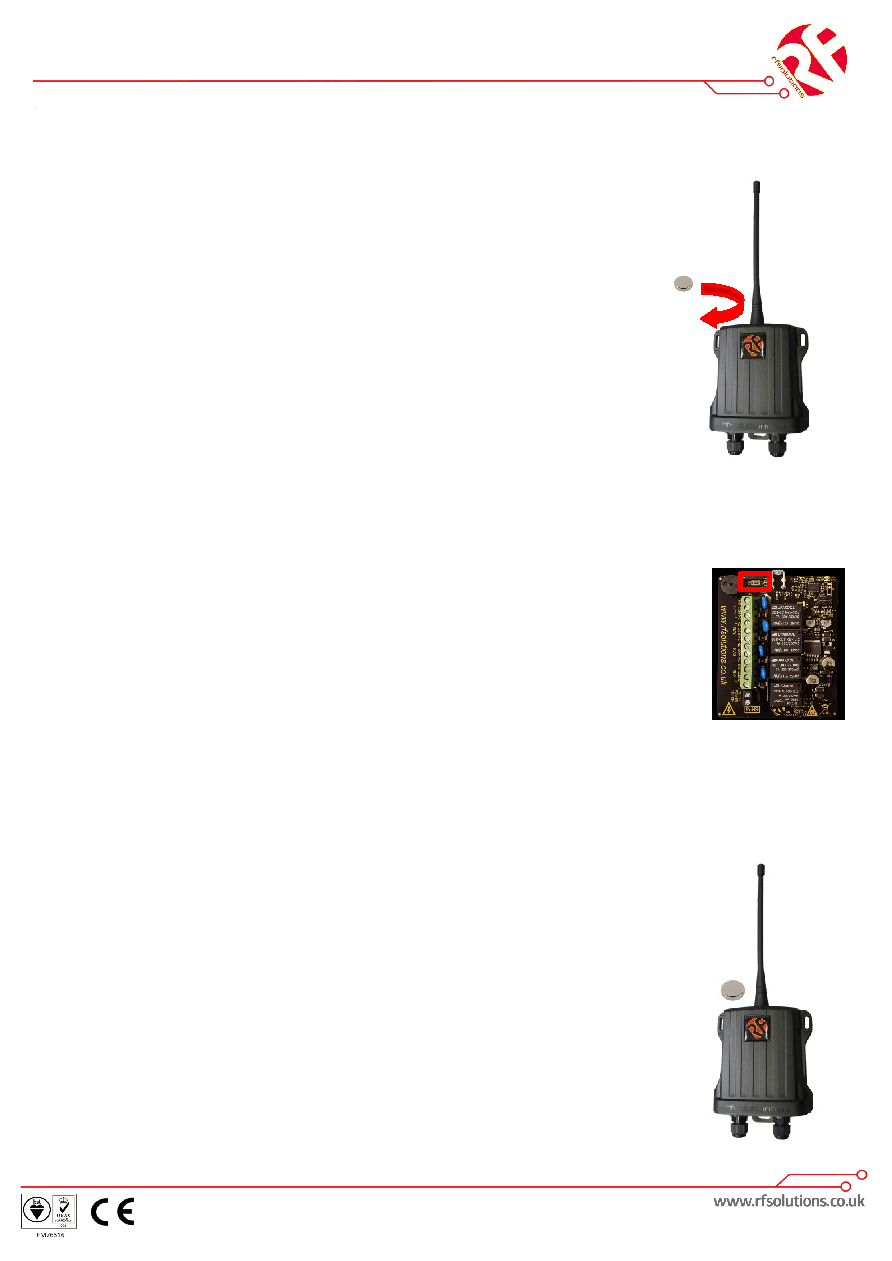 HORNET PRO DS-HORNETPRO-3 Pairing a transmitter button using the LEARN switch option (12-30Vac-dc Receiver only) To pair a new transmitter switch follow this procedure: Unscrew the antenna, Open the enclosure, and extract the Circuit-board as- sembly 1. Briefly press the receiver LEARN switch once 2. The Learn LED will flash once (One flash means the receiver unit is ready to allocate a transmitter to relay output 1) 3. To select relay output 2, 3 or 4, briefly press the LEARN switch again and repeat until the LED flashes 2, 3 or 4 times. The LED will flash the correct number of times to indicate which Relay output is selected. 4. Press the button on the transmitter you want to learn to the chosen relay. 5. The Learn LED will flash to indicate Pairing is complete. Maximum Number of Transmitters to a Receiver Each receiver has a maximum memory for up to 30 pairings, these can be from the same or any number of transmitters. Erasing Receivers Memory 1. Press and hold the receiver Learn Switch for ~5 seconds. 2. The receiver will sound a long Beep to confirm erased. NOTE: You cannot erase individual Tx encoders LEARN Switch Advanced operation - Pairing a transmitter button with a magnet With this system, you can pair together any individual transmitter switch with any receiver relay switch. Without opening either enclosure: 1. Briefly (less than 1 second) place a magnet next to the receiver in the position shown and then remove it. 2. The receiver will buzz once (One buzz means the receiver unit is ready to allocate a transmitter button to relay output 1)To select relay output 2, 3 o 4, briefly place the magnet again so that the Buzzer Buzzes to indicate the Relay output 2,3, or 4. 3. Press the switch on the transmitter which you wish to pair 4. The receiver will buzz twice to confirm pairing 5. Repeat for any additional transmitter switches |
|
|
Enlace URL |
| ¿ALLDATASHEET es útil para Ud.? [ DONATE ] |
Todo acerca de Alldatasheet | Publicidad | Contáctenos | Política de Privacidad | Enlace a la hoja de datos | Intercambio de Enlaces | Lista de Fabricantes All Rights Reserved©Alldatasheet.com |
| Russian : Alldatasheetru.com | Korean : Alldatasheet.co.kr | Spanish : Alldatasheet.es | French : Alldatasheet.fr | Italian : Alldatasheetit.com Portuguese : Alldatasheetpt.com | Polish : Alldatasheet.pl | Vietnamese : Alldatasheet.vn Indian : Alldatasheet.in | Mexican : Alldatasheet.com.mx | British : Alldatasheet.co.uk | New Zealand : Alldatasheet.co.nz |
|
Family Site : ic2ic.com |
icmetro.com |
 Mexican ▼
 English
 Chinese
 German
 Japanese
 Russian
 Korean
 Spanish
 French
 Italian
 Portuguese
 Polish
 Vietnamese
 Indian
 Mexican
 British
 New Zealand


